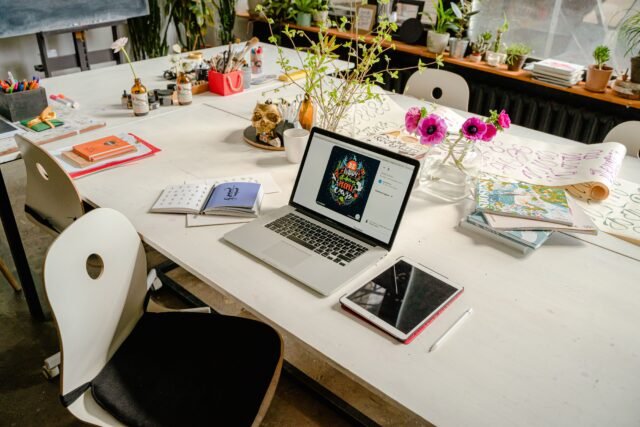
How to Combine Art and Technology?: 7 Amazing Projects (2026)
Last Updated: November 15, 2026
Art and technology are changing how people create, communicate, and experience visual stories. A simple paper collage can become a digital poster, an animation, or an interactive artwork that responds when someone touches a screen.
If you want to learn how to combine art and technology, the best approach is to start with a creative idea, choose a suitable tool, and experiment with a project you can complete.
You don’t need expensive equipment or advanced programming skills. A smartphone, traditional art materials, and free digital software can help you create original artwork.
This guide explores seven creative projects, beginner-friendly tools, real museum examples, and practical techniques for bringing traditional and digital art together.
Key Takeaways
- Combining art and technology means using digital tools to create, enhance, or change how people experience artwork.
- Beginners can experiment with digital collage, animation, sound design, creative coding, and interactive installations.
- Free tools such as Krita and p5.js make digital art accessible without expensive software.
- Traditional materials such as paint, paper, charcoal, and photographs can become part of digital compositions.
- Successful projects begin with a clear artistic purpose rather than the most advanced technology.
How to Combine Art and Technology in 2026
Learning how to combine art and technology involves understanding how creative ideas and technical tools can support each other.
Traditional art often relies on physical materials such as paint, pencils, paper, and sculpture. Digital technology introduces additional possibilities, including animation, interactive controls, sound, and programmable visual effects.
For example, an artist might photograph a watercolor painting and transform it into a digital collage. Another artist might use computer code to create patterns that respond to keyboard input.
Technology doesn’t have to replace traditional art. It can extend what artists are able to create.
What Does Combining Art and Technology Mean?
Combining art and technology means using tools such as cameras, editing software, computer programs, projectors, or sensors as part of the artistic process.
Examples include:
- Digital paintings created with drawing software.
- Handmade illustrations converted into animated videos.
- Sculptures enhanced with projected moving images.
- Interactive installations that respond to audience participation.
- Music and sound recordings integrated into visual artwork.
These approaches connect physical creativity with digital capabilities.
What Should Technology Add to Your Artwork?
Before choosing software or equipment, consider what technology should contribute.
Ask yourself three questions:
- Idea: What story, emotion, or message should the artwork communicate?
- Tool: Which technology could help express that idea?
- Result: What should the audience see, hear, or experience?
This simple Idea–Tool–Result Method can help beginners avoid unnecessary complexity.
Imagine creating artwork about a neighborhood.
Your idea might be to capture the difference between a quiet morning and a busy afternoon. You could draw a map, record sounds at different times, and connect the recordings to locations on the illustration.
The technology adds an experience that a traditional drawing alone cannot provide.
7 Amazing Projects That Combine Art and Technology
One of the easiest ways to understand how to combine art and technology is to experiment with small creative projects.
The following seven ideas introduce digital editing, graphic design, animation, audio, coding, and projection.
1. Create Digital Collages Using Paper and Photographs
Digital collage combines images, textures, illustrations, and other visual elements into one composition.
Start by painting or tearing three pieces of paper. Photograph each piece using your smartphone.
Open the photographs in a digital editing program that supports layers.
Arrange the images to create a new composition. Enlarge one texture for the background and use another to frame the main subject.
Try repeating one color or shape throughout the artwork to create visual consistency.
Beginner tip: Save the original photographs before editing. This allows you to experiment without losing your source material.
2. Design Posters With Handmade Textures
Graphic design mixed media combines physical artistic elements with digital typography and layout.
For this project, create a poster for a fictional concert, school event, or community exhibition.
Begin with a painted background and a paper illustration. Photograph both elements and import them into an editing program.
Add digital text for the event name, date, and location.
Leave enough empty space around the text to maintain readability.
Test your finished poster at smartphone size. If the event information becomes difficult to read, adjust the contrast or simplify the background.
This project demonstrates how traditional artwork can support modern graphic design.
3. Make a Stop-Motion Animation
Stop-motion animation creates the illusion of movement by displaying a sequence of photographs.
You can make a simple animation using paper figures, handmade objects, or drawings.
Follow these steps:
- Cut out a simple paper character or shape.
- Place it on a stable surface.
- Position your smartphone so the camera remains steady.
- Photograph the character.
- Move it slightly and take another photograph.
- Repeat until you have 24 images.
- Import the images into a suitable frame editor.
- Play the sequence at eight frames per second.
Twenty-four frames at eight frames per second produce a three-second animation.
Keep the lighting consistent and avoid moving the camera between photographs.
Creative idea: Animate a paper flower opening, a character walking, or shapes forming a recognizable picture.
4. Create an Illustrated Sound Map
Sound maps combine visual storytelling with recorded audio.
Draw a simple map of your neighborhood, school, or another familiar location.
Record three sounds, such as footsteps, passing vehicles, or wind moving through trees.
Mark each recording location on your drawing.
Next, organize the audio clips so viewers can identify which sound belongs to each numbered location.
Add a short written description of every recording.
This project demonstrates how sound technology can add atmosphere and context to visual artwork.
For an accessible presentation, include written descriptions or transcripts of meaningful audio.
5. Create Computational Art With p5.js
Computational art uses programming rules to generate or change visual compositions.
One beginner-friendly tool is p5.js, a JavaScript library designed for creative coding.
The free p5.js Web Editor allows users to experiment directly in a browser.
For your first project, create a grid of circles.
Then modify the program so the circles change size when someone moves the pointer or presses an arrow key.
This introduces an important idea: instead of drawing every element manually, you define rules that control the artwork.
The official p5.js getting-started tutorial explains the fundamentals.
Beginner tip: Start with one shape and one interaction. Add complexity after the first version works.
6. Build an Interactive Digital Portrait
Digital interactive art allows the audience to influence what appears on the screen.
For this project, create two versions of a portrait.
The first might show a traditional ink illustration. The second could include photographs, symbols, places, or words that reveal additional information about the subject.
Add a clearly labeled button that switches between the two images.
When viewers activate the button, the artwork changes.
This technique can help communicate different perspectives, memories, or interpretations.
For accessibility, ensure the button works with a keyboard and clearly communicates its purpose.
7. Combine Sculpture With Digital Projection
Projection art uses light and moving images to transform physical surfaces.
Begin by folding paper into a simple three-dimensional sculpture.
Create a short animation featuring moving lines, shapes, or textures.
Use a projector to display the animation across the sculpture.
Observe how the projected image changes when it reaches folds, edges, and shadows.
The sculpture becomes part of the visual effect.
Start with one folded sheet before creating a larger installation.
If you don’t own a projector, ask whether your school, library, or community organization has one available to borrow.
How to Make Mixed Media Digital Art Step by Step
Understanding how to combine art and technology becomes easier when you follow a repeatable creative process.
Digital collage is an excellent starting point because it requires relatively few materials and introduces several essential techniques.
What Materials Do You Need?
You can begin with:
- Paper and pencils.
- Paint or other traditional art materials.
- A smartphone camera.
- A computer with suitable editing software.
- Original photographs or appropriately licensed images.
For digital editing, Krita offers free, open-source painting software with layer-based editing capabilities.
You can also explore Smithsonian Open Access for digital collection materials.
When using museum images, inspect the rights information for each item. Look for the CC0 designation when selecting material intended for unrestricted reuse.
Step 1: Choose a Creative Subject
Select one subject that interests you.
For example:
I want to show what my street looks and feels like after rainfall.
This statement helps guide your choices of images, textures, and colors.
Step 2: Create Physical Textures
Paint a watercolor wash to represent the street.
Create a second texture by rubbing a pencil across paper placed over a textured surface.
Photograph both materials in even lighting.
Keep your smartphone parallel to the paper to reduce distortion.
Step 3: Combine the Images Digitally
Open your editing software.
Create a new document and import the photographed textures.
Arrange them into three layers:
- Background texture.
- Secondary texture.
- Main illustration or photograph.
Experiment with positioning, cropping, and transparency.
Step 4: Test Different Compositions
Create two versions of the artwork.
In the first, make the main subject larger.
In the second, leave more empty space around the subject.
Compare both versions at the size your audience will actually see.
Choose the composition that communicates the idea most clearly.
Step 5: Export and Save Your Work
Save an editable project file before exporting the final image.
Use PNG when you need transparency or lossless image quality.
JPEG can be useful for photographic artwork when a smaller file is needed.
Keep the original source materials and the editable project for future revisions.
Practical tip: If a photographed texture looks flat, experiment with natural window lighting before applying digital filters.
Best Art Technologies to Compare in 2026
Choosing the right software or equipment depends on your artistic goals.
You don’t need every available digital tool. Start with the one that solves a specific creative problem.
| Creative project | Recommended tool | Main purpose | Starting cost |
|---|---|---|---|
| Digital collage | Krita | Combine images and textures using layers | Free software |
| Mixed media poster | Krita and a printer | Combine physical textures with digital text | Free software; printing costs vary |
| Stop-motion animation | Phone camera and frame editor | Create motion from photographs | Potentially free with existing tools |
| Illustrated sound map | Phone recorder and audio editor | Connect recorded sounds to locations | Potentially free |
| Computational art | p5.js Web Editor | Create rule-based interactive visuals | Free editor |
| Projection sculpture | Projector and animation player | Display moving images on physical objects | Equipment costs vary |
Which Technology Is Best for Beginners?
If you enjoy drawing, photography, or graphic design, start with digital collage.
If you want to explore motion, experiment with stop-motion animation.
If you are interested in programming, try computational art with p5.js.
If you prefer hands-on projects, explore sculpture and projection.
The best choice is the tool that helps you express your idea without introducing unnecessary technical difficulties.
Do You Need Expensive Equipment?
No. Many beginner projects can use devices and materials you already own.
A smartphone can capture photographs, video frames, and audio recordings.
Free software can support digital painting and creative coding.
Specialized equipment becomes useful when your project requires features that simpler tools cannot provide.
For example, a projector may be necessary for an installation designed to cover a large physical surface.
Before purchasing equipment, test a smaller version of your project whenever possible.
Real-World Examples of Art and Technology
Museums provide useful examples of how technology can change the relationship between artwork and audiences.
Two notable projects demonstrate different approaches to interactive experiences.
Cleveland Museum of Art: ArtLens Wall
The Cleveland Museum of Art developed the ArtLens Wall to help visitors explore works from its collection.
The museum documents a display approximately 40 feet wide, consisting of 150 display tiles.
Its interactive design allowed visitors to browse groups of artworks and examine individual objects more closely.
The museum describes the wall as part of the broader evolution of its ArtLens experience.
What artists can learn: Technology can make a collection easier to explore by allowing audiences to select themes and examine details.
You can adapt the idea for a smaller exhibition.
Start with six photographs organized into three themes. Allow viewers to select a theme and open individual images to discover additional information.
Cooper Hewitt: Interactive Digital Pen
The Cooper Hewitt, Smithsonian Design Museum introduced a digital Pen experience in 2015.
The Pen allowed visitors to collect information about museum objects and interact with digital design activities.
The original Pen experience operated from 2015 to 2020.
This example demonstrates how technology can encourage participation rather than passive observation.
What artists can learn: An interactive artwork can invite viewers to collect, explore, or create something during their visit.
These multimedia art examples illustrate an important principle: the purpose of technology should determine the design of the experience.
How to Share Technology Artwork Successfully
Creating an artwork is only one part of the process.
You also need to consider how people will access, understand, and interact with it.
Make Interactive Art Accessible
Digital interactive art should provide clear instructions and usable controls.
Before publishing, ask someone to try your project without assistance.
Observe whether they understand what to do and how the artwork responds.
Then test the project using:
- A keyboard.
- A smartphone.
- Muted audio.
- Different screen sizes.
- A slower internet connection, when relevant.
Provide meaningful labels for interactive controls.
Add captions to videos containing important audio and transcripts for audio recordings.
Where appropriate, offer a still image and a written description as an alternative to an interactive experience.
The W3C Web Accessibility Initiative provides guidance on making digital experiences more accessible.
Protect Your Original Artwork
Before sharing a project, save the editable files and original materials.
Maintain a record of any photographs, music, sound recordings, or museum images used in the work.
Check licensing requirements before distributing or modifying third-party content.
For digital exhibitions, test how the artwork behaves when the device restarts or loses its internet connection.
Build a Creative Portfolio
A portfolio can demonstrate both artistic ability and technical decision-making.
For each project, include:
- The original sketch or material.
- A photograph or screenshot showing the creative process.
- The finished artwork.
- A short explanation of how technology contributed to the result.
If you eventually want to sell handmade artwork or creative products, explore our guide on how to start a craft business.
For artists interested in offering photography services, our photography business guide discusses practical considerations for turning creative skills into a business.
Common Mistakes When Combining Art and Technology
Understanding how to combine art and technology also means recognizing problems that can make projects unnecessarily difficult.
Choosing Technology Before the Creative Idea
Advanced software cannot replace a clear artistic purpose.
Define what you want to communicate before choosing equipment.
Adding Too Many Effects
Animation, sound, transitions, and interactive controls can compete for attention.
Start with one digital technique and add more only when it improves the experience.
Ignoring Accessibility
An interactive project may look impressive but become frustrating if viewers cannot operate its controls.
Test the artwork with different devices and provide alternatives where appropriate.
Forgetting to Save Editable Files
Exported images and videos may not preserve the layers or settings needed for future changes.
Keep an editable master file alongside the final version.
Using Images Without Checking Rights
Not every image available online can be reused freely.
Check licensing information and obtain permission when required.
These precautions help make creative projects easier to maintain, share, and develop.
Frequently Asked Questions About How to Combine Art and Technology
How to Combine Art and Technology Using a Smartphone?
You can photograph drawings, edit images, create stop-motion animations, and record sounds using a smartphone. Start with a simple project such as a digital collage or illustrated sound map. Choose an editing application that supports the features you need.
Do Artists Need to Learn Coding?
No. Many digital art projects can be completed using visual editing tools. Coding becomes useful when artists want to create programmable patterns, interactive effects, or artwork that changes according to specific rules.
Is Mixed Media Art Always Digital?
No. Mixed media art combines different materials or artistic media and can be entirely physical. Mixed media digital art introduces digital tools into that process, such as combining a photographed watercolor with digital typography.
What Counts as Technology Artwork?
Technology artwork uses technical tools as a meaningful part of its creation or presentation. Examples include digital animation, interactive installations, projection-based sculpture, and computational art.
What Are Easy Art and Technology Projects for Students?
Digital collages, paper stop-motion animations, and illustrated sound maps are accessible starting points. Students can work in pairs, share devices, and explain how the chosen technology changed their finished artwork.
How Much Does It Cost to Start Digital Art?
Some projects require no additional software spending if you already have a compatible device. Krita and the p5.js Web Editor are free. Physical materials, printing, and specialized equipment may involve additional costs.
Can You Combine Art and Technology Without Artificial Intelligence?
Yes. Traditional digital editing, photography, animation, audio recording, creative coding, and projection can all combine art and technology without requiring generative AI.
How Do You Choose Your First Project?
Choose a small project that matches your interests and available equipment. If you enjoy textures, make a digital collage. If you enjoy movement, try stop-motion animation. If you want audience participation, create a simple interactive artwork.
Conclusion: Start Combining Art and Technology Today
Learning how to combine art and technology doesn’t require expensive equipment or years of technical experience.
The most important step is choosing a creative idea and finding a tool that helps communicate it.
Digital collage lets artists combine physical and digital materials. Animation introduces movement. Creative coding allows artwork to respond to rules and interactions. Projection transforms ordinary surfaces into dynamic visual experiences.
Start with one simple project:
- Choose a subject that interests you.
- Create a drawing, photograph, or physical texture.
- Add one digital technique.
- Test the result with another person.
- Save and share your finished artwork.
Your first project doesn’t need to be complicated. It needs to demonstrate how artistic creativity and technology can work together.
Ready to begin? Photograph a drawing and a paper texture today, combine them into a digital image, and experiment with two different arrangements.
Sources and Further Reading
The project instructions in this guide are illustrative educational examples. Museum case studies draw on institutional documentation, while software and accessibility references point to official resources.
- Cleveland Museum of Art — ArtLens Wall
- Cooper Hewitt — Using the Pen
- Smithsonian Institution — Open Access
- p5.js — Getting Started
- Krita — Official Website
- W3C — Accessibility Principles
Editorial note: This article provides educational guidance and project examples. Software features, museum installations, and availability of equipment may change over time.


MOST COMMENTED
Business
What Does a Business Consultant Do? Complete Guide for 2026
Business
Why Businesses Need a Professional Website?- Best 2026 Guide
Business
Why Is Accounting Called the Language of Business? Best 2026 Full Guide
Business
How to Invest in a Small Business? -Best 2026 Guide
Business
How to Start a Craft Business: The Complete Guide (2026)
Business
How Much Is My Business Worth? A Complete Guide for 2026
Business
How to Grow a Heating and Air Conditioning Business in 2026